Secure routing for your containerized applications using Traefik v2 and Let's Encrypt
Posted
Contents
Introduction
A robust reverse proxy setup is critical for any self-hosted configuration that has elements exposed via the public internet. While reverse proxy services are often used for load-balancing and security reasons, most home-server owners use them to route requests aimed at different domains or subdomains to different internal hosts or services.
This post will guide you through the process of setting up Traefik as a reverse proxy. Traefik is an alternative to other popular reverse proxy services like NGINX and HAProxy that places an emphasis on integration with cluster and container services.
We will work through a simple use-case where we would like to securely route requests aimed at a specific subdomain to a specific port on a local Docker container. This will include the installation and configuration of Traefik and the necessary modifications to enable SSL-secured routing to your local container.
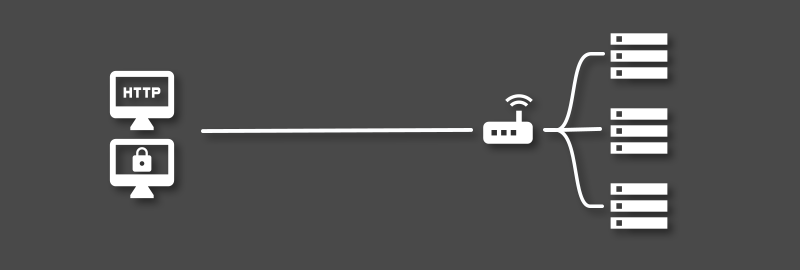
This guide assumes that you have already set up port forwarding on your router to direct HTTP and HTTPS traffic to your server. If not, portforward.com is a great resource to assist with this.
What is a Reverse Proxy?
Most people are familiar with regular forward proxy servers that process outgoing requests from a private network. These are frequently found in enterprise environments, and are often used to limit access to certain resources (such as blocking social media in an office), or to provide anonymity by hiding the IP addresses of local clients.
While a forward proxy controls internal access to external resources, a reverse proxy controls access external access to internal resources.
According to NGINX:
A reverse proxy server is a type of proxy server that typically sits behind the firewall in a private network and directs client requests to the appropriate backend server. A reverse proxy provides an additional level of abstraction and control to ensure the smooth flow of network traffic between clients and servers.
The above definition covers exactly what we are aiming to achieve in this post - the routing of different client requests to the correct host or service. In addition to the above, reverse proxy servers can also fulfil a number of other important functions:
Load balancing
Popular websites or services often have requirements far beyond what one physical server can handle. Load balancing allows requests to the same site to be distributed among a pool of servers to prevent any one server from being saturated.
Anonymity
Reverse proxies provide an additional layer of obfuscation by never revealing the IP address of the backend server that actually handles requests. This means that attackers will usually only be able to attack the reverse proxy servers itself.
This is one of the most common uses of Cloudflare’s CDN.
SSL encryption
A reverse proxy server can be configured to provide SSL encryption to clients, using one or more certificates for different services or subdomains. This simplifies the role of the backend server and can reduce computational load.
Traefik can automatically provide this functionality for each route that is defined by obtaining certificates from Let’s Encrypt.
Setting up Traefik v2
Now that we have a firm grasp on the role played by a reverse proxy, let’s get Traefik v2 running in a docker container. Grab the docker-compose file below.
---
version: "2"
services:
  traefik:
    image: traefik:v2.0
    container_name: traefik
    ports:
      - 8080:8080
      - forwarded_http_port:80
      - forwarded_https_port:443
    volumes:
      - /var/run/docker.sock:/var/run/docker.sock
      - /path/to/traefik/acme.json:/acme.json
      - /path/to/traefik/traefik.toml:/etc/traefik/traefik.toml
    restart: unless-stopped
There are a few things to take note of in the above configuration:
forwarded_http_port- the port to which port 80 traffic is forwardedforwarded_https_port- the port to which port 443 traffic is forwarded/path/to/traefik/- a local path on your server to store your configuration files
Next, we can configure the Traefik application itself using its own configuration file, traefik.toml. Copy the contents of the file below and paste it in your configuration directory, indicated above by /path/to/traefik.
[api]
  dashboard = true
  insecure = true

[providers]
  [providers.docker]
    endpoint = "unix:///var/run/docker.sock"
    watch = true
    exposedbydefault = false

[entryPoints]
  [entryPoints.web]
    address = ":80"
  [entryPoints.websecure]
    address = ":443"

[certificatesResolvers.letsencrypt.acme]
  email = "<email address>"
  storage = "acme.json"
  [certificatesResolvers.letsencrypt.acme.httpChallenge]
    entryPoint = "web"
The above configuration is all we need to get started. Let’s break up a few of the important bits.
Docker Integration
Traefik makes use of providers to achieve configuration discovery. Traefik uses the API of each provider to find routing information and configure itself accordingly.
endpointis the entry point for the Docker API, must match your docker-compose filewatch = trueeffectively results in Traefik watching docker for changes to containersexposedbydefaultdefines whether containers with no Traefik labels will be used or ignored by Traefik
Entrypoints
Entrypoints simply define the ports that Traefik will listen on to receive packets. Two entrypoints are configured here, web and websecure for ports 80 and 443 respectively.
Let’s Encrypt Integration
Traefik can automatically interface with certain ACME providers like Let’s Encrypt to automatically generate and renew certificates for your services. Some boilerplate configuration of the certificate resolver is needed to get this running.
emailis simply the email address that you want to provide to Let’s Encryptstoragedefines the location where your certificates will be saved. This must match your docker-compose filehttpChallengespecifies that you will be using the HTTP ACME challenge- This will prove domain ownership by provisioning a resource under a well known location
- This must be accessible by Let’s Encrypt through port 80, hence the
webentrypoint
Container Configuration
As mentioned earlier, Traefik uses the API provided by different providers to discover services and routing information. The last step to exposing your container using Traefik is to add some Docker labels that will let Traefik discover it.
Copy the labels here, and refer to the breakdown below.
labels:
    - traefik.enable=true
    - traefik.http.middlewares.servicename-redirect.redirectscheme.scheme=https
    - traefik.http.routers.servicename-redirect.entrypoints=web
    - traefik.http.routers.servicename-redirect.middlewares=servicename-redirect
    - traefik.http.routers.servicename-redirect.rule=Host(`subdomain.yourdomain.com`)
    - traefik.http.routers.servicename.entrypoints=websecure
    - traefik.http.routers.servicename.rule=Host(`subdomain.yourdomain.com`)
    - traefik.http.routers.servicename.tls.certresolver=letsencrypt
    - traefik.http.services.servicename.loadbalancer.server.port=serviceport
Before explaining too much, a few substitutions need to be made for your setup:
servicenamemust be replaced with the name of your application (I.e.plex)subdomain.yourdomain.commust be replaced with the address that will be used to access the container. For example,plex.jswart.xyzserviceportmust be replaced with the port that your service uses- Note the presence of backticks instead of apostrophes in the
Hostrules
Label Breakdown
First, we make this container detectable by Traefik by setting traefik.enable. Without this, and using the exposedbydefault = false configuration option, Traefik will simply ignore the container.
Next, we define two routers - one for your actual service - routers.servicename - and one to redirect HTTP traffic to the HTTPS entrypoint for your service - routers.servicename-redirect.
For the redirection service, we also create a redirection middleware that defines a scheme change to HTTPS - middlewares.servicename-redirect.
We define the redirection router using the unsecure web entrypoint. We tell it to use the middleware that we have just created, and provide a Host rule that tells Traefik which domain (I.e. plex.jswart.xyz) should be associated with this router.
The main router for the service is configured using the websecure entrypoint. Clients will either establish a connection on port 443 directly, or they will be redirected by the router configured above.
In addition to the Host rule, we also provide this router with a certificate resolver in the form of letsencrypt. This effectively specifies that we would like a certificate to be issued and maintained for this endpoint.
Finally, we define a load balancer which will be used to actually redirect the incoming traffic from the websecure port (443) to the correct port for your application.
Conclusions
That’s it! Hopefully if you spin up your containers you should now be able to access the Traefik Dashboard on port 8080 of your server. If all goes well, you should be greeted by a screen similar to the one below, which is running on my server for two containers.

You should now also be able to securely access your service by accessing your domain name, but you may need to enable NAT Loopback on your router before this is possible from within your local network.
I hope that this guide has provided some insight into reverse proxy services with Traefik as a possible solution. As always, leave a message in the comments if this proved useful to you.